Episode 8 Early April
Cleaning Schedule phase 4
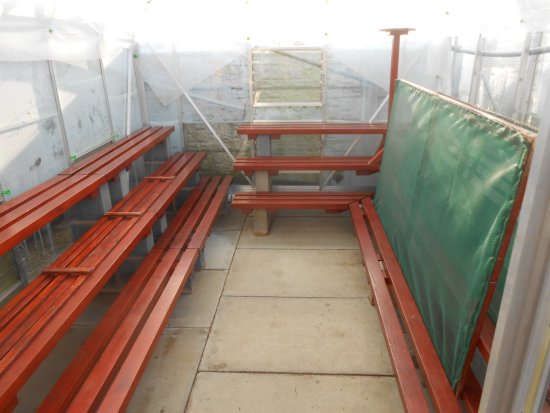
This is the 4th & final phase of my cleaning programme, the cleaning of my
main greenhouse. This time I bring out the big guns in the form of my Karcher power washer. The greenhouse is stripped out and it’s
 blasted
clean inside and out, then I spray it inside and out with Armillatox and
leave it to dry out. The staging is cleaned off and again sprayed down
with Armillatox and replaced back into the greenhouse and allowed to dry
out. Then it’s finished off with a couple of Sulphur Candles.
blasted
clean inside and out, then I spray it inside and out with Armillatox and
leave it to dry out. The staging is cleaned off and again sprayed down
with Armillatox and replaced back into the greenhouse and allowed to dry
out. Then it’s finished off with a couple of Sulphur Candles.
Finally I fleece the roof and everything is ready for the plants to go
in later in the year.
year.
The final thing I do now is check the staging for any “bare” bits of
wood that have occurred through wear and tear, if any are found then
they are given a light sanding down and re-varnished.
Well it’s taken me over 2 weeks, with an hour here and an hour there.
All my dirty plant pots have been washed, stacked and put away. The
picture on the left is for Basil Billinger just so he knows what he is
missing or not as the case will properly be.
The
Holy Grail –
When most new growers start out they always believe that there is a
“magic ingredient” that can make a big Cut Bloom or Pot Plant – there
are some seasoned growers that think the same.
I have heard the of the following “magic ingredients” being used by some
of our top growers like
Ian Donaldson and Kennedy McQuiston -
• Pixie dust
• Spiders cobwebs
• Rocking horse “manure”
Well I can honesty tell you it’s none of the above – it's – wait for it –
GOOD CULTURAL PRACTISE – throughout the growing year
Please remember you cannot put a good flower on a poorly grown plant.
However saying this I sometimes think John Hamilton could “plat fog” so
to speak, as I have seen some great looking flowers on some dodgy
looking plants at times in his greenhouses.
My
“magic” mix –
Please remember this mix works for me, and has taken me a few years to
get to this stage and to understand what I was doing and why.
This mix is to a bushel / 36 Litres
21 Litres of Kettering Loam
9 Litres of Shamrock medium to course
6 Litres of 4mm Alpine grit & Sharp Sand
8oz Vitax Q4 fertilizer
1.5oz Dolomite Lime
1.5oz Garden Lime
6oz NutriMate
2 “scoops” of Calcified Seaweed
The reasoning behind the use of certain ingredients are as follows
I use x2 types of lime because
• Dolomite lime – contains both Calcium & Magnesium, it has neutral pH
of 7 and will never go above 7.
• Garden lime – contains more calcium and is faster acting than Dolomite
Lime
Garden lime is fast acting and the Dolomite lime is slow acting – so the
Lime is spread out evenly over a longer period.
Calcified Seaweed is supposed to encourage the regrowth of the good
bacterial colonies quicker back in the sterilised loam.
NutriMate is 100% organic and contains x2 types of “acid”
• Humic Acid quickly locks up the available nutrients in the
soil or compost to avoid leaching
• Folic Acid allows for better up take and use of nutrients
in the plant
4mm Alpine Grit opens my Johns Innes No2 Mix better than perlite or Sharp
Sand so I split it – 4 litres Alpine Grit and 2 litres Sharp Sand
This mix
is then left to stand for a week to ensure all the ingredients are
allowed to “settle” before use.
Now this mix is a lot harsher than a multi-purpose mix or a lot of ready
mixed John Innes No2 bought in a bag. This results in the plant “sulking”
a little for a week as its acclimatising to the mix, but once they get
there feet in so to speak it does not take them long to catch up to a
plant that has been started in a “softer” medium.
Now a key
point to remember here, is that when you pot up with this mixture
– YOU ONLY TAP THE POT TWICE TO SETTLE THE MIX –
The loam has a high clay content the last thing you need is it
compacting down as this will lead serious issues with regards “soil
compaction” later in the year.
This also goes for Bob Bryce!!!! If you ever let him in your greenhouse
the first thing he will do is get his fingers in your pots, pressing the
medium down to see if there are roots in the pots. Let him by all means
tip a plant out of the pot to check the roots but don’t let him push a
clay loam based mix down with fingers as this type of compaction is
called “Bobpaction”!!.
Potting
up the tuber & root ball -
• Get the tuber you have taken out of the hotbox gently shake
off any “ excess starting medium”
• Now find a pot that will just accommodate it – rule of
thumb is ½ to ¾ of an inch between root end and side of pot.
• Now I put about 3/4 inch layer of my John Innes No2 in the
bottom of the pot.
• Then gently sit the tuber and root ball on the “medium bed”
in the pot
• Gently fill the sides and top of the tuber with
my 1st
potting on medium
• Tap the pot once
• Then give it a little water to settle it.
• Place the pot back on a little bottom heat
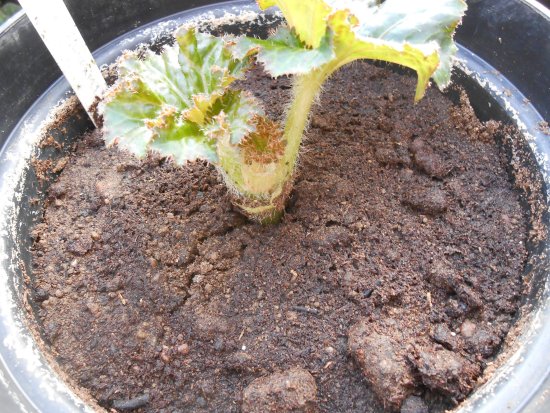
First
Potting up of my adult tubers –
If I am honest I have been caught out a little by the weather we have
had in the last 4 to 5 days as we had temperatures in the late teens
which meant the temperature in the greenhouse hit 70+ degrees. This
 resulted in a massive growth spurt and I went from pips just breaking
through the surface to now showing a good 3inches of growth (see pic on
left). I managed to get my John Innes No2 mixed today (Monday
23/03/2015) – so I will be potting them up by the end of the week.
resulted in a massive growth spurt and I went from pips just breaking
through the surface to now showing a good 3inches of growth (see pic on
left). I managed to get my John Innes No2 mixed today (Monday
23/03/2015) – so I will be potting them up by the end of the week.
At present I would say I am now a good week behind potting them up.
I will have to start to take the basal cuttings off the tubers in the
Hotbox before the end of the week.
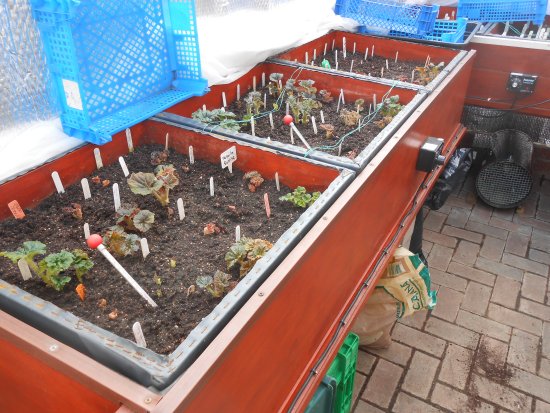
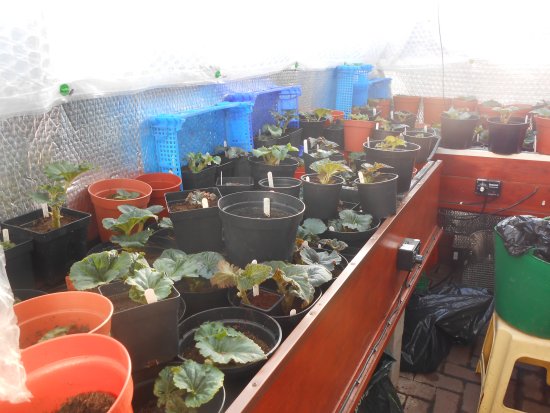
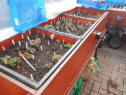
I cannot wait to “de-basal” the tubers when they have been potted up.
The main reason why I cannot leave them on any longer, as I have to get
them down to the one chosen “shoot / main stem” as I don’t want the
tuber to expend energy on anything else at present. The picture on the
right shows all the tubers in one of the hotbox’s stripped back to 1
stem and potted up.
leave them on any longer, as I have to get
them down to the one chosen “shoot / main stem” as I don’t want the
tuber to expend energy on anything else at present. The picture on the
right shows all the tubers in one of the hotbox’s stripped back to 1
stem and potted up.
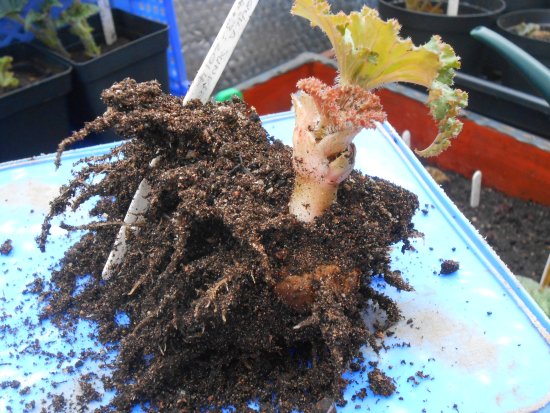
Saturday 28th / Sunday 29th March -
Now if I am honest not everything has gone to plan as I have found
some varieties like Tequila Sunrise,
 Tom Brownlee and Golden Hind to
name a few have produced some fantastic root growth (see the picture on the
left). Where other varieties have not done as well and
Tom Brownlee and Golden Hind to
name a few have produced some fantastic root growth (see the picture on the
left). Where other varieties have not done as well and have produced
slow root growth, but have produced some good top growth.
have produced
slow root growth, but have produced some good top growth.
The strange thing is that it seems to be an even spread of “both
types of tuber” so to speak across the hotbox units, so there are no
obvious signs to indicate a heating cable has broken or the thermostat
control unit has gone down as well. The thermometers I placed in the
“beds” are showing the correct temperature evenly spread across the “beds”.
Looks like I am going to have to put that down to one of those
frustrating unexplainable things that happens with our hobby at times.
My other big problem is that I am limited to the amount of space I
have available when it comes to putting the potted up plants back on the
heat to help acclimatise to the change from coming out of a snug bed and
placed in a pot with a harsher medium.
Having that little bottom heat does matter and makes a difference, so I
have x4 options –
• Keep the air temp at 15°c that’s around 60°f. My reasoning
is that if the outside temperature is at
60°f then the side of the pot
will be 60°f and hopefully that constant temperature will transfer
through the walls of the pots and the medium in the pot. Well that’s my
thought process, it could be right or wrong but we will see.
• I place the first layer of pots on the base of the hotbox,
and then stack the next layer on top just like you would if you are
building a house of cards. My theory behind this a simple one; heat
rises off the hoxbox and hits the bottom of the pots and with air
temperature at 60°f circulating around the top of the pot, this enables the
pot to be surrounded by a warm atmosphere.
• Buy a Greenhouse Heat Blanket!!!!!
• Monday 30th March bought a Greenhouse Heat Blanket;
hopefully it will be here for Easter weekend when I empty the second
hotbox.
I managed to get 4x 5ft by 1ft and 1 inch thick polystyrene “sheets”
from the Warehouse at work – these will be laid down to form a type of
bed before I put the Heated Blanket down. This should insulate the
bottom of Heated Blanket and protect it from any heat loss below.
Start
of the Area Meeting Season -
Years of Information gathering or just being nosey or inquisitive –
Mikes sermon
Over the years I have travelled god knows how many thousands of miles to
meetings, shows and open days or just visiting other growers and their
greenhouses all in the search of knowledge attaining to the Begonia and
meeting some great people along way. I have never been afraid to ask any
question no matter how stupid they might have seemed to others, because
to me it meant something.
This has resulted in me having 2 x A4 ring binders full of notes
that I have taken over the years, and from these notes I have drawn my
battle plans at the start of each year. This year is no different I know
the shows I what to exhibit at. There are a couple of things I am going
to try this year that in my subconscious will give me the edge, whether
they do or not we will see later on this year.
What I am trying to say is -
• Don’t be afraid to stick your hand up at meeting and ask a
question
• We are a friendly Society so don’t be afraid to approach
someone you have seen in a picture in National Begonia Society bulletin
and introduce yourself whether it’s just to say hello or ask a question.
• Don’t do what other growers do until you know why they are
using it or why they are doing it, because if something goes wrong you
will not know what and why it’s happened.
• It would be nice to see some new exhibitors joining the
small band of existing exhibitors. So if you fancy joining our small
band at the show benches and are a bit apprehensive why not ask a
current exhibitor to help you by way of a “mentoring” relationship.
• The show bench is the shop window for our Society
• I have said this before but exhibiting is a great way of
improving ones growing.
• Bob Bryce has mentored quite a few growers in the past, but
there are other growers out there who may be able to support or help.
• You meet some incredible people along the way and forge
some great friendships.
• The main thing is to enjoy it.
Until next
time….