Episode 14. The lead up to
bud take.
Saturday 30th
May –
June 26th is D Day for me - 50 Days to the National Show at
Shrewsbury so that gives me 27 days or near as damn’ it 4 weeks until I
have to select my buds for the show.
 So now I have to watch my plants on at least x4 fronts –
• The plant is still trying to throw side shoots / cuttings
and even the odd basal cutting.
• Watering, don’t let it splash the stem as this could lead
to stem rot at ground level.
• The bud size (will explain more later)
• Is the plant running out of steam, so does it need a feed.
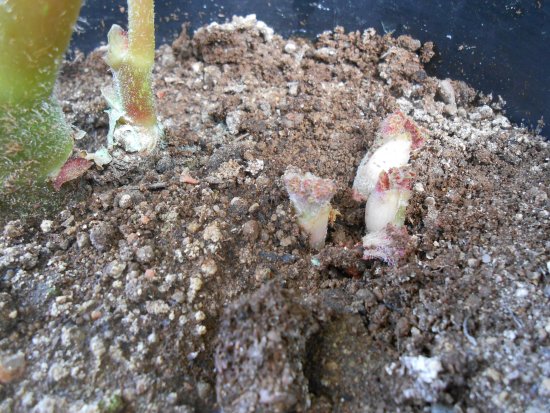
Now at this point of the season I don’t like to take basal cuttings off
the tuber so instead I let the basal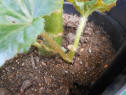 cutting grow until it develops a leaf
then I nip out the growing point (see picture on the right). The
reasoning behind this is that an extra leaf or two will help the plant
as follows -
cutting grow until it develops a leaf
then I nip out the growing point (see picture on the right). The
reasoning behind this is that an extra leaf or two will help the plant
as follows -
Back to school part 1 – Leaf function
The leaves are the powerhouses of plants. In most cases leaves are the
major site of food production for the plant. Structures within a leaf
convert the energy in sunlight into chemical energy that the plant can
use as food.
Sunday
31st May -
Now it’s time for me to feed my plants – they have been in their
final pot for approx. x5 weeks and are ready for a feed of Calcium
Nitrate.
Back to school part 2 - Why Calcium Nitrate
Calcium Nitrate is a fertilizer that contains two of the basic
nourishment elements that a plant must have: Nitrate nitrogen and
calcium. Because of the combined intake of the calcium and the nitrate
by the plants, there is no residue in the roots as with other types of
fertilizer. The positive effect by the combination of these two basic
elements is that it does not leave the soil salty.
It contains Nitrogen in the form of nitrate –
Nitrogen in nitrate form is the plants preferred form of nitrogen.
It helps the plant absorb other nutrients in addition to calcium.
Particularly in clay soils (don’t forget I use Kettering Loam which has
a high clay content), ammonium may trap the nitrogen in the soil,
rendering it unavailable to the plant. Nitrate on the other hand, does
not absorb the nitrate nitrogen to the soil. It remains in the root area
in a form that is easy to absorb and in this way allows the plant to
quickly receive its nutrient requirements.
Calcium is critical for plant nutrition –
Calcium is a macro nourishment element that the plant consumes a
lot of. It is required for structural roles in the cell wall and
membranes. It is frequently found in soil in a compound form that plants
cannot use. It does not transport well in plants. For this reason, it is
necessary to do calcium fertilization in addition to other kinds of
fertilization. Plants cannot grow without calcium.
After nitrogen and potassium, calcium is the next most consumed
requirement by the plant
I mix the
formula to the instructions on the packet and water straight into the
pot, towards the side of the pot and away from the stem.
Tuesday
2nd June – weather update
Well what more can I say about the weather so far this year!!! Not
a lot that’s what.
It has to be one of the coldest starts for the first 6 months of
the year for a number of years. I need some warm weather quickly to push
my plants on; if I am honest I am starting to worry a little now.
I still have my bubble wrap up in both greenhouses; it has usually been
down a good 3 weeks by now.
My other worry is that it’s getting close to the initialization of the
bud and if the temperature keeps fluctuating like it is then the
following may happen.
• Colour run
• Blotching
So my only option to help avoid this potential problem will be to put
some heat into the greenhouses at night to try and even out the day and
night temperatures.
That’s just one of the things I feel that has to do when growing a
limited number of plants and so cannot play the percentage game like
others can do. Basically I have to make every plant count.
Wednesday 3rd June -
Just like items in your house that gather dust etc. so do the
leaves on your plants, so I just attach a watering lance to the hose
pipe make sure is on the mist setting and just spray all my plants down.
 You can more or less see your plants breath in and out and look better
straight away.
You can more or less see your plants breath in and out and look better
straight away.
This is one of the quirky things I do hoping it gives me a slight edge –
It cannot do any harm.
I make sure the weather is overcast and do mist them down about teatime
(1730hrs approx.) so they have plenty of time to dry out, just in case
the sun comes out to play the next day.
Sunday
7th June –
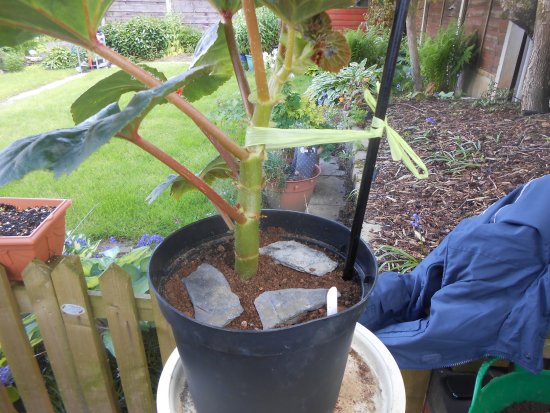
Top dressed, slated the pots and tying the plants to their “canes” -
Top
Dressing - I look at each plant individually and see if they are in
need of top dressing –
• This is where I put a little fresh John Innes No2 on top of the
surface of the pot.
Slating
the pots - Well it’s time to slate my plants – What I hear you cry –
It’s time to slate my plants!!!!
I put slate on the top of the surface of the pot; the reasons are as
follows –
• Stops the moisture in the top of the pot evaporating and
drying out to quick
• The slate keeps the top of the medium dark and cool
• Encourages the root to grow to the top of the pot and not
dry out
• The root will fill all the pot and access all the nutrients
locked in by using nutrimate.
• It also helps me not to let the water splash on to the stem
when watering with plain water or water containing feed – as
this can cause stem rot.
• In my head it just one of those quirky things that works
for me
(If you think slating my pots is different – Robert Bryce crocks his
pots!!!)
Tying
the plant to the cane Part 1 – This is where I tie the plant to the
“cane”.
Now I personally use a wide synthetic raffia ribbon to tie my
plants to the canes.
Why a wide ribbon I hear you ask!! Well it’s because I do not want it to
“dig in” or bruise the stem, for example like a “string type” tie will
do.
Please be aware that if you use a natural raffia product to tie your
plant to the stake then there is a chance that when it gets wet and damp
there is a high risk it can harbour harmful spores that can lead to
diseases and fungus’s being transferred to the plant.
I tie the plant to the cane by using a figure of eight – so basically
the ribbon cross’s over itself between the plant and cane – then I wrap
both ends of the ribbon once around the stake then I tie it like I would
a
 shoe lace. This allows me to easily undo and alter it later in the
season if I have to.
shoe lace. This allows me to easily undo and alter it later in the
season if I have to.
(Tying the flower to the cane Part 2 – will be a later instalment)
What I also do at this point is also try and “open” the top of the plant
up.
I do this by very gently bending the leaves down, I hold the leaf stem
at the point it touches the leaf and just roll it between finger and
thumb so the leaf slowly falls back on itself. Don’t whatever you do
bend it back from the bottom of the leaf stem or the leaf will snap off
at the stem. This could result in an entry point for stem rot.

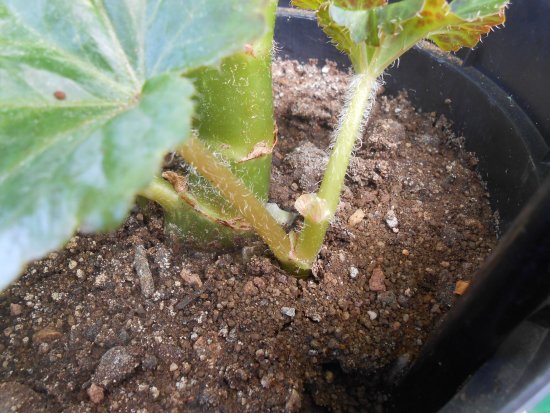
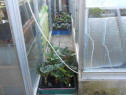
Now I still have the odd plant that I cannot stake yet as I still have
no idea with regards what side of the plant the flower will come (see
picture on the right). For that reason I will wait until I take the bud
before I worry about trying to stake and tie the plant
By
Monday 8th June -
I have gone through all my plants that I intended to try and get flowers
on for the shows and I have –
• Continued to “rub” out any side shoots
• Taken all the buds off all the plants
 Now the plants have been -
• Tied to their stakes
• Top dressed
• Slated
• Fed Calcium Nitrate
All I can do is pray for some warm weather to get some growth on
the plants in the next couple of weeks
Thursday 11th June – The weather changed drastically
5am it was 9°c by 10am it was blue skies and warming up, by 12 it hit
20°c. I managed to get home for 4pm and got the bubble insulation down
on my middle greenhouse and put up a sheet of fleece to act as shade –
luckily I lost no plants do to sun scorch or “melting”.
Friday
12th June
5am it again had fallen into single figures but it was clear blue
skies, by 11 am it was in the 20°c by the time it was 2pm it had reached
23°c. Again when I got home for 4pm I got the bubble insulation down out
of my propagating greenhouse and again fleeced the roof to act as shade.
Once again I was lucky enough not to suffer from sun scorch and losing
any to “melting”
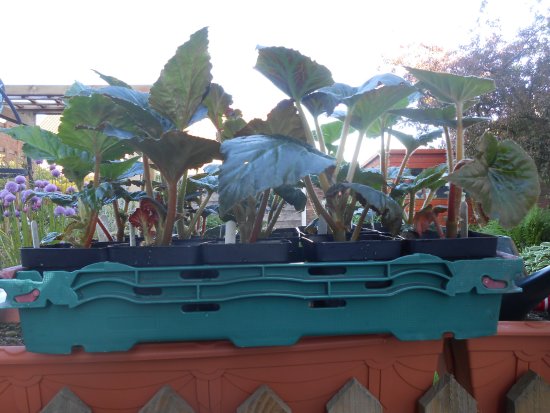
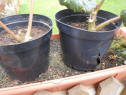
Cuttings update -
As you can see by the picture on the left my cuttings have started
to move since I managed to get them on some bottom heat and are now
starting to look a bit better.
 The homemade multi-purpose I potted my rooted cuttings in has more or
less run its course so now I will have to start to feed them.
The homemade multi-purpose I potted my rooted cuttings in has more or
less run its course so now I will have to start to feed them.
I use a balanced fertilizer in the form of Chempak 3 with an NPK ratio
of 20:20:20 –
• Some growers feed a full strength feed once a week.
• I feed a ½ strength feed at nearly every watering.
I also –
• Once I get x2 sets of leaves I “nip” out the growing point
on the cutting
• Every side shoot a cutting tries to throw I “rub” them off
as well
• However I do let it throw x1 flower as I like to check the
cuttings match the plant label
What I try and do is make the plant think the only way to survive is by
producing a tuber.
 I have also at this time of the year “thrown” my most advanced cuttings
outside, as room is at a premium. So they have to fend for themselves
now, unlike other growers I don’t have any cold frames so mine just get
put in mushroom trays and are literally left outside to fend for
themselves so to speak.
I have also at this time of the year “thrown” my most advanced cuttings
outside, as room is at a premium. So they have to fend for themselves
now, unlike other growers I don’t have any cold frames so mine just get
put in mushroom trays and are literally left outside to fend for
themselves so to speak.
The run
up to bud selection –
Forecasting the weather -
Now one of the major problems an exhibitor has to face, is forecasting
the weather before bud take to what the weather will be like after bud
take –
• If the weather stays cool and cloudy, it will take the
flower longer to open – so you will have to lengthen your bud to flower
timings to accommodate this. If not then your blooms will not be
properly open in time for the show.
• If the weather gets hot in prolonged spells, then the
flower will open quicker – so you will have shorten the length of time
of your bud to flower timings to accommodate this. If not your blooms
will have gone over before the show.
A
previous lesson learnt the hard way -
About 5 years ago I tried to roughly work out how long it took for
a bud to form from nothing to 28mm, so for that year I measured and
timed a number of varieties from pulling off all the buds and how long
it took to grow one back to 28mm. So the following year armed with the
information I had gathered I thought I would be really cleaver. The only
problem was I got a little carried away with myself, couple that with a
few other things going on in my life at that time and I made one of the
biggest mistakes of my “growing career” I came home one night 14 days
away from 44 days out to Southport Flower Show and I pulled every bud off
every plant I had. It was not until the following morning on my way to
work that it dawned on me what I had the done, I had stopped everything
to x1 varieties timing – to ensure I had flowers that year I had to put
heat in the greenhouse to push the buds on – luckily I still had enough
flowers to show.
I never did that again – and now keep it as simple as possible.
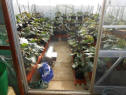
Disaster No 3 -
Those who know me are aware that I am not the best on my legs so in
my 2nd greenhouse I have to be careful walking between the cuttings on
the left and plants on the right – It’s a kind of sideways shuffle until
I get the cuttings out then I have more room to move around.
It was at this point I was in mid shuffle when I lost my balance and I
knew I was going to fall so I had x2 options –
 1. Fall over and crush at least x9 plants on the staging to avoid the
glass (as I am not a small lad any more)
1. Fall over and crush at least x9 plants on the staging to avoid the
glass (as I am not a small lad any more)
2. Crush x3 plants and “take” x3 panes of glass “out”
I took option 2, took out and obliterated x3 panes of glass but only
crushed x2 plants
Until next
time….