Episode 22. Into Autumn
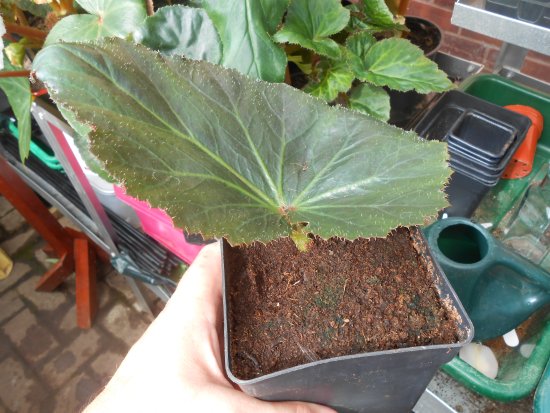
Size of
my bloom backing plates – (missed by accident of my last article)
My cardboard backing plates that I use to protect my blooms are
10inches in diameter. Why this size, well I will try and explain my
reasoning.
If you measure your blooms across whilst they are in the greenhouse
with the backing plate on you may find its approx. 9inches, at this this
point you might jump up and down with joy thinking you have grown a 9
inch flower. Well I am sorry to say that you have not, because when you
take the backing plate off of the back of the flower and place the bloom
on the board you will find it naturally falls back a little as the
petals “fall back” into their natural position.
When this happens you can lose up to ¼ inch + per bloom. Now if the
flowers are at 9 inches the petals between x2 blooms will touch however
with the petals settling into their natural position you could now be
faced with a gap between two blooms of at least ½ inch +.
This means you have to have blooms with a diameter of at least 9½ inch’s
when they are on your backing plates to allow for the natural petal
“fall back”.
That’s why I use a backing plate cut to a diameter of 10 inches.
Saturday 22nd August –
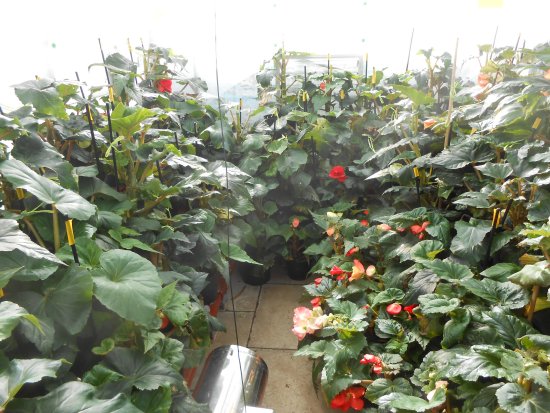
 All
my plants that started this year as a tuber, either a cutting tuber or
adult tuber have now all been moved into a greenhouse.
All
my plants that started this year as a tuber, either a cutting tuber or
adult tuber have now all been moved into a greenhouse.
They are now all sprayed with Fungus Clear Ultra, this is my second
preventative spray against Mildew. As at present with the weather as it
is it will not be long before the dreaded scourge that goes under the
name of Mildew will be trying to rear its ugly head.
All my cuttings are still outside braving all the elements that
mother-nature has to
 throw
at them. We have had that much rain round this neck of the woods that my
cuttings have only had
throw
at them. We have had that much rain round this neck of the woods that my
cuttings have only had to be watered by my hand on 6 occasions – and at each watering they have
had at full strength Chempak 3 feed just to get some feed into them.
to be watered by my hand on 6 occasions – and at each watering they have
had at full strength Chempak 3 feed just to get some feed into them.
Now many many moons ago I was told by my father that a plant will
always do better growing outside where they can get rained on due to the
natural nutrients that are “carried” in the rain, that’s why I would
sooner grow my cuttings outside for a couple of months – rather than
keeping them “undercover” and protected from the elements.
Back to
school part 3 – Tap water vs Rain water
 Now
there are two camps on subject of - Rain water
Now
there are two camps on subject of - Rain water
For:
• During its flight through space towards earth it
accumulates a number of chemicals that get dissolved into it – one of
the main chemicals rainwater comes into contact with is Carbon Dioxide
(CO2) which has the effect of acidifying the rain water.
• Normal rainwater acidity can be very beneficial for plants.
• Most plant roots like acid water as it makes the minerals
more available at the resulting lower pH (lower pH means more acid).
• Air is mostly nitrogen, so nitrogenous compounds tend to
form in rainwater, and nitrogen is a natural fertilizing nutrient.
• During a heavy downpour it can flush all the accumulated
salts in the pots making the roots that much happier and healthier
• Washes the leaves and keeps them clean and free from dust
• The leaves can take in nutrients every time it rains or
there is heavy morning dew.
• Rain water is usually soft.
• No utility bill!!!
Against:
• If there are pollutants in the air, it can be really acidic
and you will have what they call acid rain.
• Storing captured rain water in storage butts can lead to a
build up of bacteria that can prove harmful to your plant.
And there
is two camps one subject of - Tap Water
For:
 • If you leave fluoridated water out overnight at room
temperature to let fluoride evaporate before watering
plants then there is no problem.
• If you leave fluoridated water out overnight at room
temperature to let fluoride evaporate before watering
plants then there is no problem.
• Where I live the water that is supplied via the mains comes
from a source that provides soft water – This means I have no issues
with the problem of having my water supplied softened beforehand as the
water supplied is not hard.
• Free so to speak if you are not on a water meter.
Against:
• Contains Chlorine – Chlorine is a chemical added and is
very effective at killing bugs.
• Contains Fluoride – Fluoride is added for dental reasons.
• Contains varies degrees of Sodium.
• The Chorine and Fluoride in tap water can be hard on plants
cells, causing some necrosis (hence brown tipping of leaves).
• Most Tap waters are hard and have a large amount of calcium
and / or magnesium added to purposely soften it.
• Costs money if you are on a water meter.
All my cuttings are left open to the rain – however my adult plants are
fed using tap water that has been left standing in the greenhouse for 3
to 4 days or until it comes up to temperature of the greenhouse it is
stood in. This avoids any chance of shocking the plant with cold water
if you water them straight away.
September –
Tubers -
Now I have known growers cut the top half of the plants off when
they get into September – This I think is wrong for the following reasons
-
• Due to “Global Warming” the end of summer and autumn are
now a lot wetter.
• Due to the cooler climate and lack of sun the plants take a
lot longer to dry out.
• If you do not have the top growth how is your plant to
“dry” out!!!
So all I do is leave the plants as they are and just keep them slightly
damp to keep them going unto October when I stop watering.
In the meantime I will keep an eye on them just in case any leaves
fall or any parts rot back – as it’s the normal thing to expect these
things now.
Problems faced at this time of the year -
 Start of September your plants will start to go “down”, the first signs
of this are as follows –
Start of September your plants will start to go “down”, the first signs
of this are as follows –
• The last parts of your flower stems will be falling off
now. They will probably be found lying on a leaf that they have fallen
on to or on top of the plant pot itself. If you don’t pick them up when
you see them they will very quickly rot back and this can result in stem
or leaf rot due to the spores released from the fallen flower stem
rotting back.
• The top of your plant will be starting to rot back because
of the time of the season, so I just cut this section off the plant than dry the cut
surface and dust with Sulphur.
season, so I just cut this section off the plant than dry the cut
surface and dust with Sulphur.
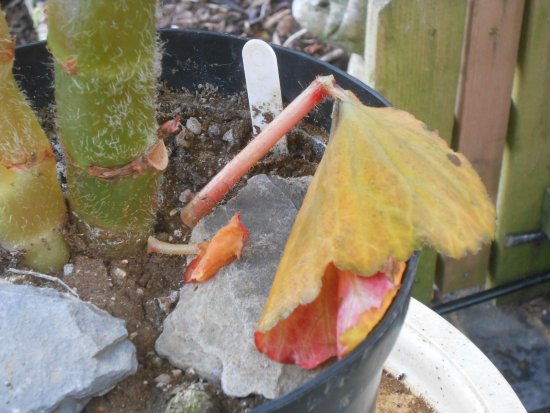
 • You will start to see leaves turn yellow and fall from your plant, as
soon as you see this pick them up quickly. If you don’t pick them up they will rot back and this can result in stem or leaf rot
due to the spores released from the fallen leaf rots back.
• You will start to see leaves turn yellow and fall from your plant, as
soon as you see this pick them up quickly. If you don’t pick them up they will rot back and this can result in stem or leaf rot
due to the spores released from the fallen leaf rots back.
The easiest way I have found how to deal with these x 3 issues is
to give the plants a check over once over every week. At the same time I
give any plant a “touch” of water if they look too dry. I aim to stop
watering at the start of October, so I am aiming to just keep them
ticking over until then.
Please be aware that your plants will be starting to slow down now
as the season changes and the plant heads towards dormancy. This means
it will not be taking up as much water so do not overwater it at this
time of year, just try and keep it ticking over so to say. If not you
will face the horrible prospect of trying to dry your tubers out when
they are still wet and there is not the growth or warmth
to dry them out.
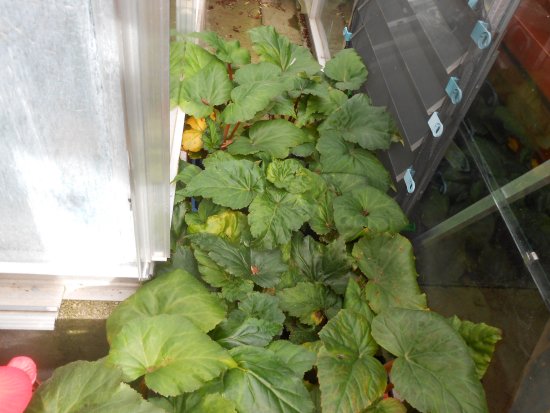
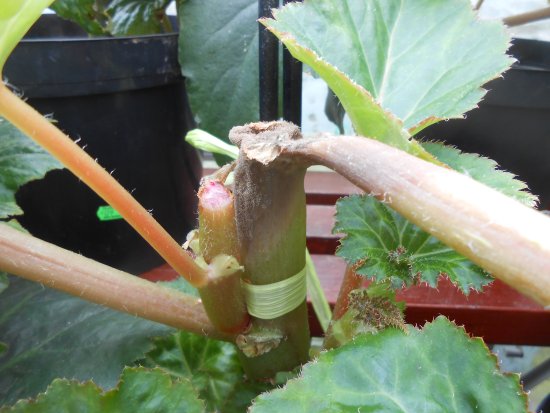
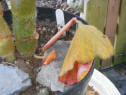
In the past this has happened to me from time to time so I have had to
take the root ball out of the pot, turn the pot upside down and stand
the “plant” on top of the pot – so the air can circulate around it and
 hopefully dry it out.
As you can see from the picture on the left –
this is one of the plants I fell onto earlier in the year that I
wrote about – what was left of the stem has rotted back so I have cut it
back to some clean stem and its being “treated” as explained above,
hopefully this will dry it out slow enough but not slow enough where it
can be detrimental to the tuber.
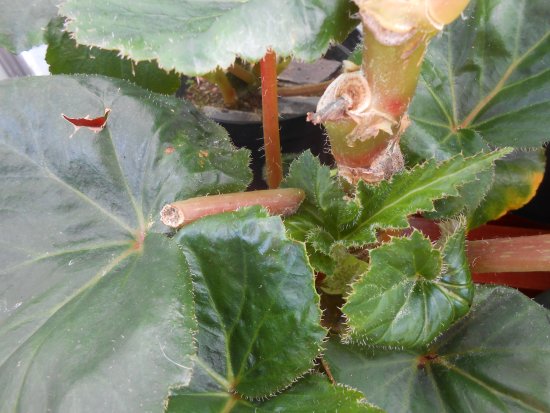
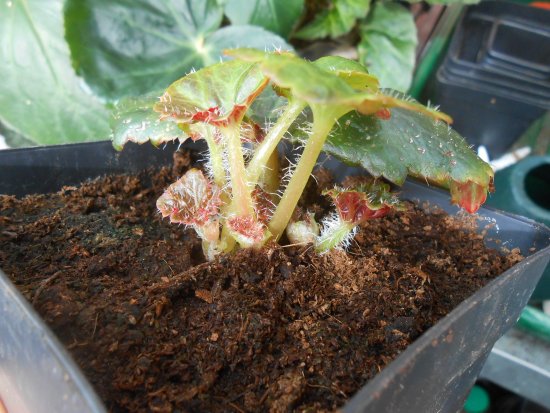
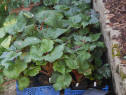
Cuttings –
 As you can see by the pictures on the left and right just to highlight
how easy it is to take a leaf cutting –
As you can see by the pictures on the left and right just to highlight
how easy it is to take a leaf cutting – these x2 late leaf cuttings are of a cutting of Joan Bryce, and as you
can see one has “thrown” from the base.
these x2 late leaf cuttings are of a cutting of Joan Bryce, and as you
can see one has “thrown” from the base.
Now the season switches over to the production of cutting tubers
and the focus is now on my cuttings.
They will be brought in as soon as the temperatures start getting lower,
and kept warm and watered and fed – as if I leave them out much longer
with the change in climate the leaves could start yellowing and dropping
and this is the last thing I want to happen at the moment.
So that means they will have to be somehow “shoe horned” into what
little space I have left in them.
So they will be brought into my propagating greenhouse where I will give
them a little heat by putting in my parwin heater. Now if I keep them
watered and continue to feed then I will prolong their growing season.
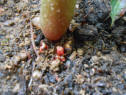 As you can see by the picture on left your cuttings should be showing
signs of tuber development by now.
As you can see by the picture on left your cuttings should be showing
signs of tuber development by now.
At this time of the year I start to switch my cutting feed over to
Chempak 4 because it has a higher Potash feed. This is because not only
do I want to make a sturdier cutting to get me to the end of the year
but I want to start ripening the cutting tubers slowly.
I want to do this now because as soon as I get into late October early
November my cutting stems usually start coming away from (fingers
crossed) the tuber.
Tuesday
1st September -
 Mildew
–
Mildew
–
This is the time of year where you have to keep your eyes peeled for the
first signs of Mildew.
And today I found my first x2 spots of it on x2 plants of Sweet Dreams.
Every year it’s the same for me – Sweet Dreams always seems to be
effected by Mildew first, I don’t know if other growers find that a
certain variety gets effected before any other!!
I whipped out my x2 litre sprayer containing Fungus Clear Ultra and
quickly sprayed the effected leaves ASAP - I am quicker on the draw than
any western gun slinger when it comes to the first sign of Mildew.
Thursday 3rd & Friday 4th September -
I went through all my cuttings, rubbing any side shoots and growing
points out, then giving them a full strength feed.
W/C
Monday 7th September -
It has been a very warm week which has resulted in most of cuttings
being watered and fed twice.
Thursday 16th & Friday 17th September -
 Went
through all my adult tubers checking for –
Went
through all my adult tubers checking for –
• Any rotting back stems.
• Fallen stem tops.
• Fallen leaves.
• Stem rot.
• Mildew.
• Water any plants that look to dry .
Contentious Corner – (This “section” will be “going on the road”
with me next year)
Issue 13 -
It is said that talking to your plants or playing them music has an
effect on them, just ask Prince Charles on this issue.
But over the last couple of years I have found another way that our
top growers help their plants grow – by sitting in a chair in their
greenhouse drinking a can of beer and “being at one with their plants”.
Now I know what you are thinking he is pulling our leg… but am I!!! I
will give you x2 names and let you ponder over it – John Hamilton &
Ronnie Welsh.
Now I will try this next year but instead of a beer it will be a pot of
tea and a couple of Rich Tea biscuits to dunk whilst “being at one with
my plants” ….
Issue
14 -
Can the over use of Potash result in the over ripening of the tuber
causing tuber loss. We all know that over ripening can lead to losses
with regards other “vegetative material” so can it effect a tuber!!!!
Now the reason I say this is that I suffer from very few tuber losses. A
lot of books written about Begonia growing or old written articles
instruct you to give your tubers a teaspoon of Sulphate of Potash to
ripen your tubers – Why!!! You have been feeding high Potash feeds
through the flowering season so to my weird logic why should you give
them any more as there must be sufficient Potash residue left in your
medium and tuber to be more than enough to ripen your tuber.
Please may I take this opportunity to say that I have nothing
personally against the element Potash, since it may seem to some people
out there that I have “harassed, bullied and picked” on it over the last
three articles….
Issue
15 -
Have you ever noticed how many times it is has been written that
you should never water close to your plants stem or it could result in
stem rot, so water to the edge of the pot away from the plants stem.
Now have you ever noticed plants with stem rot in your garden when your
plants are just getting watered from the rain!!!! No, that’s right
hardly ever…..
Does that mean that there is something in rainwater that makes the
environment less suitable for fungal growth? So is it a case of how and
why does tap water harm them. Is there something in the tap water that
makes fungal infections more likely!!! Is it chlorine, the other
minerals and hardness of the water!!! Or even lack of oxygen!!!
Something new to try in 2016 -
Next year I am going to look at catching rain water and using it on
my adult plants to water them. However the fear I have about this is –
• What if stored rainwater somehow gets “infected” with
harmful bacteria or pathogens? So to try and avoid this I am going to
turn the water round quickly so it’s not being stored for too long and
wash it out on a regular basis. I have also seen a product that you can
just add to the rainwater collection butts which will keep any “harmful
bacteria” at bay.
• Coolglass that has been painted on the greenhouse roof
running off in heavy rain and into the rainwater storage butts – will
this have any effect – to that I do not know but I will find out.
Until next time….