Episode 5 –
mid March
I’m
afraid that I have to begin this episode on a serious note with a very
sobering report about an incident brought about by the recent spell of
bad weather. My partner in crime, Colin Elsworth, only lives 5 miles
away but crucially he is also 500 feet higher up near the top of a very
exposed hill, so he has vastly differing weather conditions to those
down here in Blaydon. The morning before the very worst of the weather
arrived, he woke up to a good covering of six inches or so of snow that
had fell overnight, but he still managed to beat a path down to the main
road and then walk to the local shop in order to stock up on some last
minute essentials before the ‘Beast from the East’ arrived in force.
Just as he left the shop, he remembered that he was out of beer so,
breathing a huge sigh of relief he quickly hurried back inside where he
was delighted to bag himself a bargain of a few bottles of one of his
favourite brews that happened to be on offer. After a long trudge home
in the snow, he put them straight into the fridge to keep cool, happy
that he had ticked off everything on the list.
Later that night, while relaxing in front of a roaring log fire and
content in the knowledge that the begonia tubers were almost as cozy as
he was – tucked up inside their propagators with plenty of insulation,
he decided that it was just about beer o’clock and time to reward
himself for all of his endeavors with a cold bottle. As he was pouring
it out, try to imagine his horror when he noticed that he had only gone
and bought himself alcohol free beer! Please note – and begonia growers
really should know better than this – always read the label carefully
before application!
Tuber
update
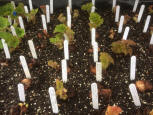
My
cutting tubers are continuing to grow although not as evenly as I first
thought, but they are all just about ready for their first pots – see
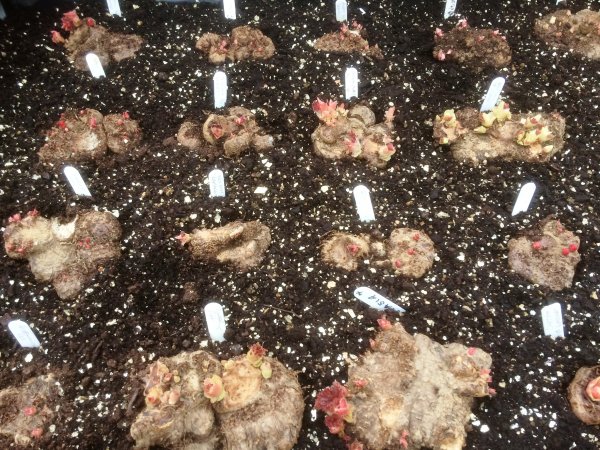
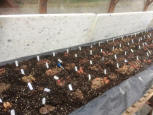
below left. The adult tubers are more uniform and as they were virtually
all pipped, they started growing as soon as they went into the
propagator – see below centre and right. They already look closer to
each other now than when I put them in so it looks like the tubers are
taking on water and growing. Hopefully the roots will be moving by now;
I’ve given a few of them a tug and things look promising, however the 20
or so adult tubers that I started around the 7th January for
early cuttings have been a bit more up and down – more detail in
‘Cuttings update’ below.

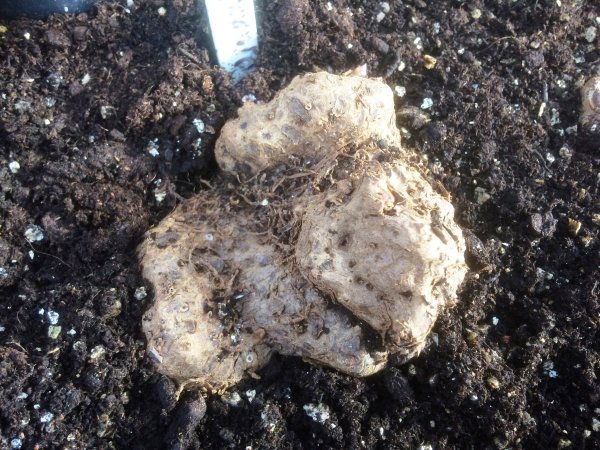
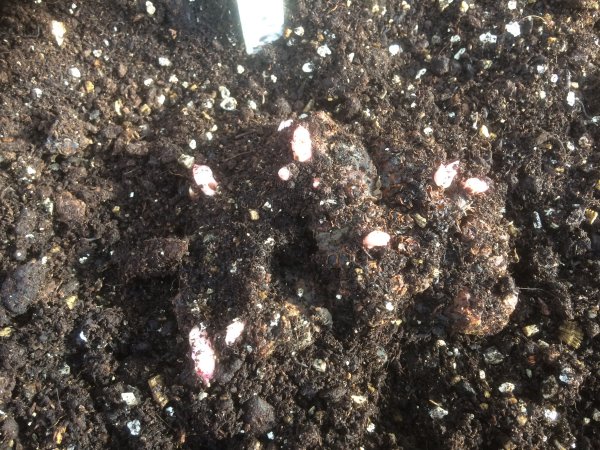
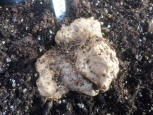
I was
checking over the few remaining adult tubers that hadn’t pipped and on
closer inspection the reason for no growth on this Douglas Drummie
became obvious – not for the first time and probably not for the last I
had put one in upside down – see below left. It looked much better when
I turned it the right way up! – see below right; I just need to grow
some roots on it now!

Cuttings update
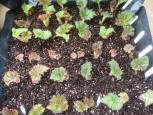
The
early started tubers are growing into the compost in the 2 litre pots
that I moved them into and the first batch of 40 cuttings from them were
taken more or less as planned on the 3rd of March – see below
left. As I said earlier, the development of the tubers was a bit up and
down so it was no surprise that the cutting material was the same. Some
of the cuttings are a bit bigger than I would normally use and some are
a bit smaller. I’m thinking about how to try and correct this for next
year and will put something in the next episode. I have managed to keep
these tubers in the conservatory for a bit of extra heat to push them
along, because as well as giving me an extra batch of cuttings, I also
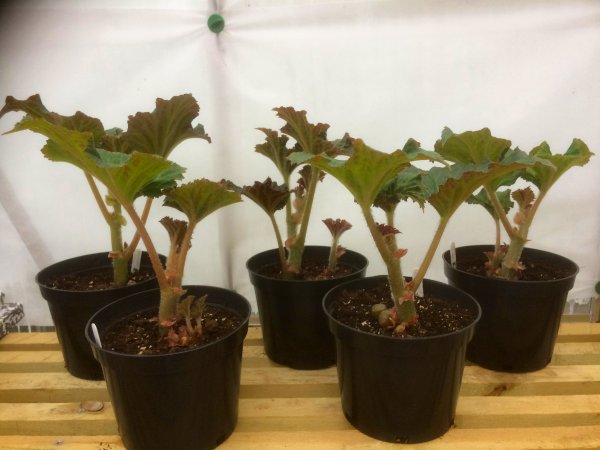
have a new plan for them. My latest idea is to grow on those that are
more advanced and try to flower them in time for
Gardening Scotland at Ingleston for the beginning of June. A few of the SBS members always put
up a society stand at this show to promote the SBS and are always
looking for extra plants, so although it really is a long shot as they
should have been started much earlier and there are only eight of them,
I think it is worth a go. To give them their best chance, I just left
the biggest shoot on each plant – see below right and rooted the smaller
ones. I’ve spoken to George Thompson, Robert Nelson and Bob Robertson
and will keep in touch with them for advice as they have been growing
for this show for a few years now. The Mother Earth they are in is part
of my trial to find an alternative to M2 should I ever need one (see
Soilless Composts in episode 4) but it should also promote more rapid
growth at this time of year than my loam based compost will. The
cuttings are also in Mother Earth, mixed 4 to 1 with Perlite.
It’s always good to have a plan and stick to it but every now and then
you have to change it and this could be either a reaction to something
that has occurred or simply because you have thought of something that
warrants a change.

Loam
based potting compost
I’ve
just made a batch of my loam compost for the first potting of the
cutting tubers. Only those that look like they have a root system
vigorous enough to cope will go into it, the others will either go into
a half and half mix made with M2 or into straight M2 until they get
established. By the second potting they all should have caught up and be
able to handle the loam compost. Note; the M2 for the half and half mix
and the straight M2 are still mixed 5 to 1 with Vermiculite.
My loam compost is based on an old formulation that I used previously
for my late flowering chrysanthemums – the only differences being that I
didn’t use the Vermiculite for the chrysanthemums – I added that for the
begonias, purely to avoid them drying out during the flowering period
when I was still working, with no guarantee of getting home at a
reasonable hour and it has just stuck. It would have been two parts
coarse grit that I used for the chrysanthemums, also, in those days I
didn’t use Nutrimate, it would have been calcified seaweed back then.
Additionally, in terms of fertilizer strength, for the chrysanthemums I
used to go from number 1 for the first pots, to 2 for the second pots
and 3 for the finals whereas I use the number 2 strength throughout for
my begonias. Finally the late chrysanthemum compost had a five inch pot
per bushel of coarsely ground charcoal to help keep the compost sweet –
bear in mind these flowers are not shown until November!
So, this is my mix – for my first couple of years of begonia growing I
used John Innes Base, not Vitax Q4 as I always did with the
chrysanthemums because JIB seemed to be favoured by most growers, but I
found that the plants showed signs of running low on nutrients before
the buds were taken so supplementary feeds were needed. I switched to Q4
because I thought it would last longer being slower release and that
proved to be the case.
●
5 parts
Kettering loam
●
5 parts peat –
Singletons Cumbrian garden peat
●
1½ parts
Singletons coarse grit
●
8 ounces Vitax
Q4 per bushel
●
6 ounces
Nutrimate per bushel
●
1½ ounces
garden lime per bushel
My
compost mixing ritual
The
Kettering loam that I use, although it has a high clay content, is quite
fine and I also use a medium grade peat so I am very careful not to make
the finished compost any finer by over-mixing. To achieve this and still
ensure that the fertilizer is well distributed I follow this ritual – I
just mix with a garden spade and I mix outside so this must be done with
no rain in the forecast!
●
All ingredients
are used dry
●
I mix either 3
or 1½ bushel at a time – just because the maths is easier!
●
Measure out the
peat, grit, Vermiculite and all but 1 gallon of the loam
●
Mix reasonably
well before adding the fertilizers
●
All fertilizers
– Q4, Nutrimate and lime are then pre-mixed with the remaining gallon of
the loam
●
Scatter this
evenly over the compost then mix in – still dry
●
Spread out then
water evenly – I usually use around about 1½ gallons for the 3 bushel
mix but I have to be cautious with this – if I overdo it the high
probability will be that the physical properties of the compost will be
ruined!
●
Leave for 2
hours to settle, turn again, check the moisture content and then bag up
As far as the
actual potting procedure goes, I am careful never to pot them too firmly
– this compost will firm up on it’s own once watered, besides, I am
paranoid about damaging roots and this is particularly applicable to
plants that haven’t been growing in individual pots or cells.
Now you will have heard this all before but the critical thing that you
have to adapt to when using a new compost formulation is how and when to
water. What I find is that it is risky to assume that, because the
surface is dry it will be dry underneath so for the first couple of
waterings I very carefully water the old root ball only and then just
give the surface a light spray to retard further drying through
evaporation. This gives the roots a chance to grow into the new compost
as they look for moisture and nutrients. I can also judge the need for
water by lifting the pots and gauging the weight.
What’s keeping me awake at night?
For
at least a couple of years now, I have promised myself to make some
decent covers for my big propagators and now that Siberia has been over
here for a visit I am regretting not making them. The milder winters we
have had recently meant that for most of the time, I only needed to
cover the propagators at night with bubble wrap but that all changed
this year and I am concerned that I haven’t given them the light that
they need because they have been covered too many times during the day,
using a combination of bubble wrap, fleece and polystyrene sheeting.
It’s far too early to be concerned about bud production being affected,
but I hope that they don’t get too lanky as a result, now that the pips
are growing into shoots. I suppose I should have had the heater on more
during the day but what’s done is done. I must do something during the
summer to fix this – I have decided what to do regarding my propagator
shortage – for next year, I am going to buy another 8 foot by 2 and move
my 5 foot by 2 to under the bench on the south side of the greenhouse.
I’ll just have to manage with what I’ve got for the rest of this season!
At least I know now what is required from me to ensure that they all
have tops for next year.
Next
episode – the second SBS meeting report