2016 Diary Episode 3 - Into the New Season
Saturday 23rd
January –
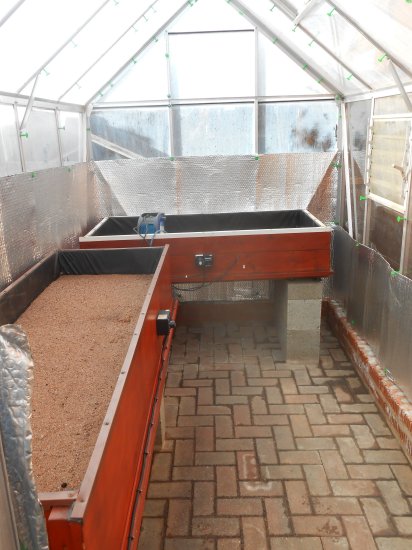
 Today I stripped everything out of my propagating greenhouse and
scrapped the top layer of dirty sand out of my hotbox units.
Today I stripped everything out of my propagating greenhouse and
scrapped the top layer of dirty sand out of my hotbox units.
The roof and sides of the greenhouse had a good spray down with Armillatox and I drenched the sand in the 2 hotbox units with Jayes
fluid. The floor was drenched and brushed down with Jeyes fluid,
then the doors shut and left to dry (see picture to the left)
The two aluminium benches that I took out where washed down and
sprayed with Armillatox and put into my main greenhouse to dry off.
Tuesday 26th
January –
Arrived home from work at approx. 14:45hrs and after a quick change I
was outside fighting the light to get my 2nd. greenhouse cleaned out
and washed down.
All the staging was taken out and given a good scrub down with hot
soapy water, then the concrete blocks that are used to support the
staging were drenched with a Jeyes fluid as well as the block wall
around the base off the greenhouse. All the glass and frames were
sprayed down with Armillatox and finally the floor drenched in
a Jeyes Fluid.
Then the doors were shut and its left to dry.
Thursday 28th
January –
Tonight I let a sulphur candle off in both greenhouses, that
means they are both ready to start the new growing season.
Saturday 30th
January –
I managed to get my propagating greenhouse and my small “overspill”
greenhouse bubble wrapped this afternoon this will help keep the heat
in and the frost and cold out.
Sunday 31st
January
–
Not a lot done today, I had a day off work so I did not get up until
10:30ish. The weather outside was rubbish, it had started raining
late
 Saturday afternoon and it was still persisting it down so to
speak.
Saturday afternoon and it was still persisting it down so to
speak.
So to make sure I had not wasted a day, and to generally make me
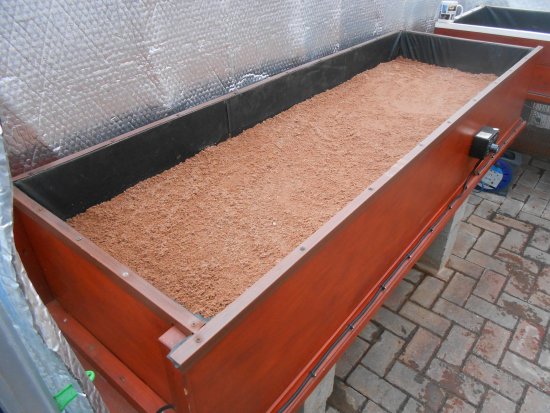
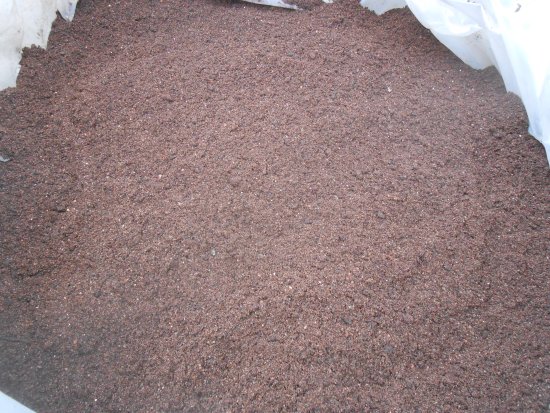
feel better about not doing anything outside I just put some fresh
grit sand in my hot boxes to level out the existing sand as you can
see by the pictures to the right and left.
Then I had a drive up to my younger brother Robert's house to borrow
some Visqueen as he is in the Roofing Game. This is to line my hot
boxes with since I am to do away with trays and the Visqueen is to form
a barrier between the sand and compost.
Tuesday 2nd
February –

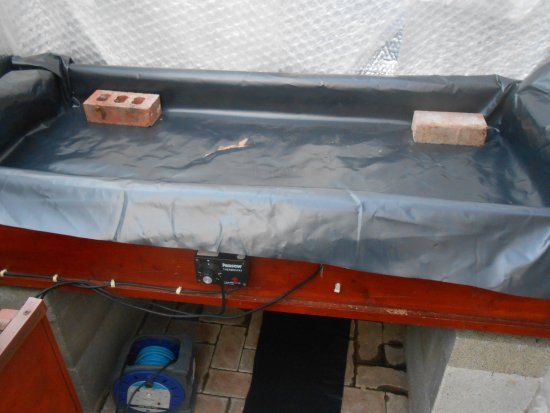
Spent an hour or too trying to fit the visqueen into my 2 hotboxes.
I managed to get them roughly fitted but I will not trim them down
properly until they are filled with multipurpose compost and has
settled properly (see pictures to left and right).
Saturday 6th
February –
Managed to make 2x100 Litres of my Homemade Multipurpose compost
today.
The formula for my mix is as follows –
• 75 litres of Sphagnum Moss Peat
• 25 litres of Sharp Sand
• 600 gram Vitax Q4
• 150 gram Garden Lime
• 150 gram Dolomite Lime
They have now been left to stand for a couple of days to mix
properly as you can see by the picture to the right.
Next year I am
thinking of starting my tubers in Levingtons M2 Pot & Bedding
compost – a number of top growers are using this to start their
tubers in these days.
The other thing I might get is an electric concrete mixer to help me
make my mixes rather than doing it all by hand.
Sunday 7th
February
–
The first job today was to get one of my small Sankey propagators up
and ready to get my small cutting tubers in. I filled the propagator
half full of sharp sand and watered it in with warm water (this will
help it come up to temperature quicker). Then I put a big tray in the
propagator and filled it with multipurpose compost and as above
using warm water I watered the compost in, then put the lid on the
propagator and set it to warm up to 70°f / 21°c. This was then left
in my “overspill” greenhouse ready for the cutting tubers.
The second job was to turn the hotboxes on low to start warming the
sand bed up and hopefully warm the Visqueen up so it becomes a
little more pliable when it comes to the final fitting.
The third job was to put a heater in both my propagating greenhouse
and overspill greenhouse ready for when they are needed.
The fourth job was to put the other aluminium staging back into the
propagating greenhouse.
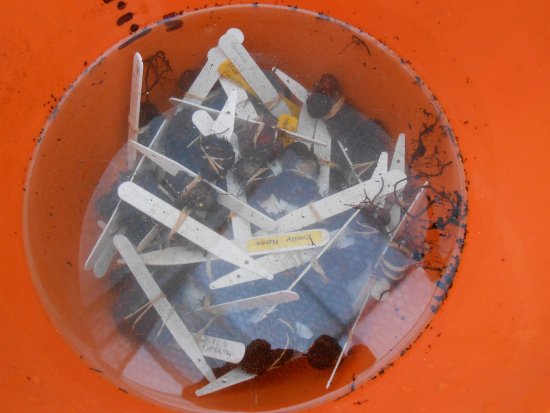
 Finally I put my
smallest cuttings tubers into a bucket of warm water as you can see
my the picture to the left –
Finally I put my
smallest cuttings tubers into a bucket of warm water as you can see
my the picture to the left –
1. This was to help plump them up a little.
2. To see if any were “rotten” – a sure sign if any of them floated.
I left them in for a good hour to “soak”.
Then I buried them in the compost in the Sankey propagator that I
had prepared at the start of the day.
I am running about
2 weeks behind with regards putting in my cutting tubers, but I have
been busy with other begonia related projects that I am currently
working on so to speak.
Monday 8th February
–
Took delivery of our new “Caledonian Tour coach” today. Had to order
one that had a little more leg room for Vincent Potts since he had a
knee replacement operation at the end of last year.
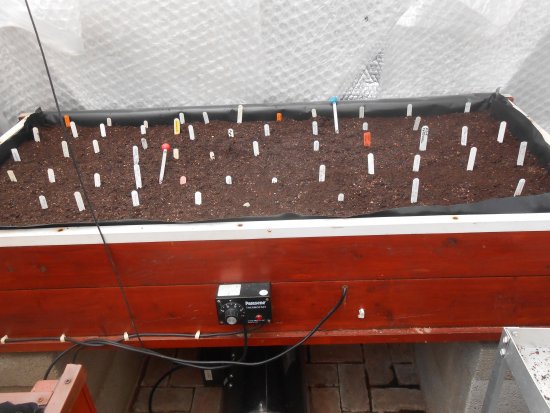
Wednesday 10th
February –
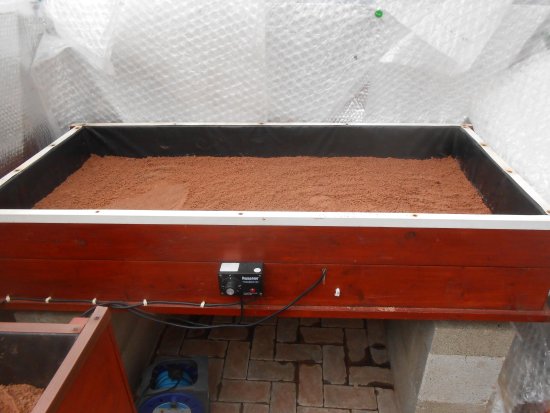
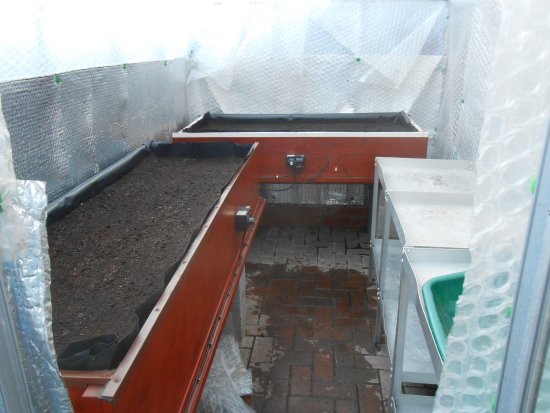
 I managed to get home earlier enough from work to fill the 2
hotboxes with my homemade multipurpose compost,
I managed to get home earlier enough from work to fill the 2
hotboxes with my homemade multipurpose compost, and then give it a
good watering in.
and then give it a
good watering in.
Then I trimmed the visqueen down to size as you can see by the
picture to the left.
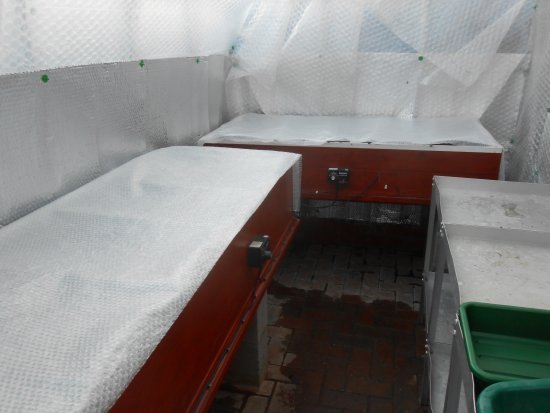
Finally I covered the tops of the hotboxes with a layer of bubble
wrap to help raise the temperature quicker (see picture to
the right).
Saturday 13th
February –

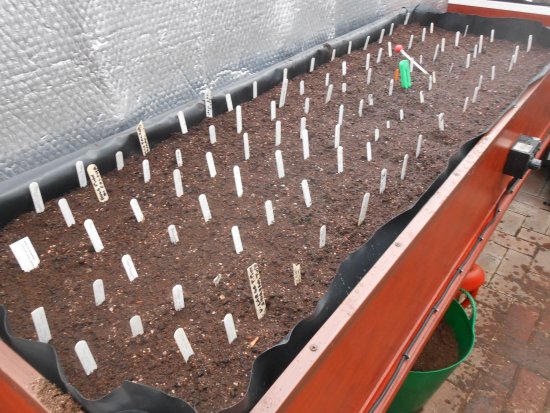
Today I put all my adult tubers in the hotboxes (see
pictures to the left & right), I had no choice really due to the mild winter we have just experienced. Just like the spring flowers
in the garden that had started to flower early due to the changes in
the seasons, my tubers had well and truly pipped.
mild winter we have just experienced. Just like the spring flowers
in the garden that had started to flower early due to the changes in
the seasons, my tubers had well and truly pipped.
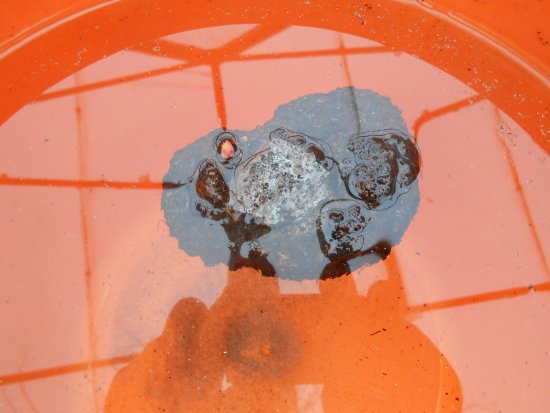
They got their normal dunk and soak in a bucket of warm water,
I do
this for the following reasons –
 • To help them swell and plump up a little, so they do not absorb
all the moisture from around them when they get buried in the
hotbox.
• To help them swell and plump up a little, so they do not absorb
all the moisture from around them when they get buried in the
hotbox.
• If they sank it was a good sign the tuber was solid and trouble
free.
• To see if any floated, this was a sure sign of problems like brown
rot.
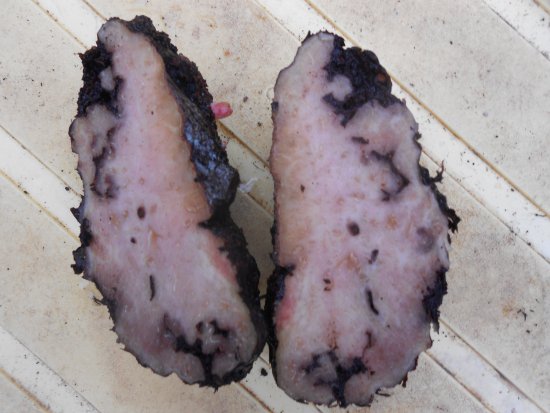
See the picture to the left showing a floating tuber and the
picture to the right showing it dissected.
Contentious Corner
2016 issue 1 -
This is a tricky one that does not quite add up…
I have a habit of sieving my peat before making my multipurpose
compost. The bag states 100 litres when filled, so I opened it up
and sieved it all through. Then I got a 12 litre bucket which has
the litre amounts marked up one side of the bucket, then measured
out 10 litres of peat tamping the bucket down on the floor to settle
it then empting it into my mixing bag. I measured just 8.5 buckets
out or the equivalent 85 litres….. That meant either –
• The orange bucket that I bought from a well-known DIY store had
the litreage marked wrong at the manufacturing stage.
• The bag did not actually filled with 100 litres when it was
filled.
It does not quite add up, does it!!!!!!!!!!!!!!!!
Public warning
Someone who will
remain nameless (Vincent Potts) thought it would be a good idea if I
took this Cultural Diary adventure one step further and do a talk as
well!!!!
Without thinking I agreed to give a talk this year at the first
North West Area Meeting on Friday 1st April.
Then my “Publicist come Agent” Vincent Potts got me gigs at the
following venues this year –
• Sunday 10th April - Scottish Begonia Society
• Saturday 23rd April - Yorkshire & Humberside Area
• Saturday 14th May - Central Area
• Sunday 20th November – South West Scottish Begonia Society
If the Cultural Diary took me out of my comfort zone then you can
hazard a guess how apprehensive I am now.
Well, what’s the worst thing that could happen!!!!
1. Me and my agent getting run out of town….
Until next time….